How To Make Friendship Bracelets: Easy Step-by-Step Guide
There is something timeless about a friendship bracelet. It reminds people of summer camp, school trips, sleepovers, and long talks with a best friend. A small, colorful bracelet can feel like a promise you wear on your wrist every day.
Updated February 15, 2026
In this guide, you will learn how to make friendship bracelets from scratch, even if you’ve never tried before. We will walk you through the basics, show you an easy step-by-step pattern, share beginner-friendly variations, and give you simple ways to make every bracelet feel personal. Along the way, you will see how DIY bracelets and personalized jewelry can work together to tell your story.
And if you want something a little more polished to pair with your handmade pieces, TheoGrace also creates personalized bracelets that celebrate the people who matter most.
Whether you are crafting with kids, surprising your best friend, or creating a set for your whole group, this is a simple and relaxing project that turns thread into something meaningful.
What Are Friendship Bracelets?
Friendship bracelets are simple braided or knotted bracelets, usually made from colorful embroidery floss or cotton thread. They are tied onto the wrist and meant to be worn as a symbol of connection.
These bracelets are more than a craft project. They often represent shared memories, milestones, and little promises between people. Friends trade them, siblings share them, and many people keep them for years as a reminder of the person who made them.
That mix of color, texture, and meaning fits beautifully with the TheoGrace way of looking at jewelry. Pieces can be playful or polished, but they always connect back to personal stories.

What You Need To Make Friendship Bracelets
You don't need a full craft setup to learn how to make friendship bracelets. A handful of simple supplies is all it takes to get started.
Begin with these basics:
- Embroidery floss or thin cotton thread in a few colors
- Scissors that cut cleanly through thread
- Tape, a clipboard, or a safety pin to hold your bracelet in place while you work
Embroidery floss is usually the easiest option. It is smooth, strong, and comes in almost every color you can imagine. You can also add a few extras if you want to make your bracelets more personal:
- Letter beads for initials or short words
- Small metal or glass beads for shine
- Simple clasps if you prefer a removable bracelet instead of a tied one
The last common question is how much string you actually need. A good rule is to measure the wrist, then multiply that length by 5 or 6. For most people, that means cutting each strand to about 30 inches, or 75 to 80 centimeters. It is better to have a little extra length than to run out just before you are finished.

How To Make A Candy Stripe Friendship Bracelet
Once you’ve got your supplies ready, it's time to learn how to make a friendship bracelet using the classic candy stripe pattern. This design creates neat diagonal stripes and is one of the easiest patterns for beginners.
Here is the process in five clear steps.
Step 1: Cut And Arrange Your Strands
Start by choosing your colors. You might pick your friend’s favorite color, your school colors, or shades that simply feel happy together.
Then:
- Cut 4 to 8 strands of embroidery floss, each about 30 inches long.
- Line up the ends so they are even.
- Tie a simple overhand knot about 2 inches from one end to hold the two ends together.
The order of the strands at the top will become the order of your stripes. If your strands are lined up pink, blue, white, and gold, you will see your stripes repeat in that order across the bracelet.
Step 2: Secure Your Bracelet
It is much easier to make a friendship bracelet when the knotted end is held in place. Before you start tying, anchor the bracelet to something stable.
You can:
- Tape the knotted end to a table or desk
- Clip it under a clipboard
- Safety pin it to a cushion, pillow, or even the leg of your jeans
Separate the strands so they lie side by side in the color order you chose. This is your starting row.
Step 3: Learn The Forward Knot
The candy stripe pattern uses one main knot over and over. It is called the forward knot, and it moves your working strand from left to right.
Here is how to tie a forward knot:
- Take the leftmost strand. This is your working strand.
- Place it over the next strand to its right to form a number 4 shape.
- Bring the end of the working strand under the second strand and up through the loop.
- Pull up gently to tighten the knot near the top.
- Repeat the same motion one more time on the same pair of strands.
Two half-knots on the same pair of strands make one full forward knot. After you finish, your working strand will have moved one position to the right.
Step 4: Build Your Stripes
Now you are ready to build your first row of stripes.
To make a row:
- Take the leftmost strand as your working strand.
- Tie a forward knot onto the strand next to it.
- Repeat forward knots onto every strand across the row, one by one, until your working strand reaches the far right.
You’ve now completed your first row. Your original leftmost color is now on the right side.
For the next row, go back to the new leftmost strand and repeat the same process. Each time you work across the row, you are stacking another diagonal stripe onto your bracelet.
As you knot, try to keep your tension consistent tension. If your knots are too loose, the pattern will look uneven. If they are too tight, the bracelet may twist. With a little practice, you will find a rhythm that feels comfortable.
Step 5: Finish And Tie On Your Bracelet
After a while, you will see a long section of repeating diagonal stripes. When the knotted part is long enough to wrap comfortably around the wrist, you are ready to finish.
To complete the bracelet:
- Tie an overhand knot at the end of the knotted section.
- Divide the loose strands into two or three groups and braid them.
- Tie a knot at the end of each braid to secure it.
If you want a simple closure, you can start the bracelet with a loop instead of a knot, then finish with one thick knot at the other end. The knot can slide through the loop so that you can take the bracelet on and off.
With that, you’ve made your first classic friendship bracelet.
Easy Friendship Bracelet Patterns For Beginners
Once you’ve tried the candy stripe pattern, you can easily branch out into other simple designs. You don’t need to learn dozens of techniques. Most beginner patterns use just a forward knot and its mirror image, the backward knot, which moves the working strand from right to left.
Here are a few beginner-friendly styles to try.
Simple Braid And Twist Bracelets
Braided and twisted bracelets are perfect for complete beginners or younger kids. Cut three strands of thread, tie a knot at the top, and braid them as you would hair. For a twist bracelet, use two strands and twist them tightly in one direction. Then, fold them in half so they twist around each other.
These styles are quick and forgiving, and they stack nicely with more detailed bracelets.
Chevron Friendship Bracelets
Chevron friendship bracelets look like rows of small V shapes. They feel more advanced than candy stripes but use the same basic idea.
To make a chevron, you arrange your colors in a mirrored order, such as blue, pink, white, pink, blue. You work forward knots from the left side toward the center and backward knots from the right side toward the center, then tie the two middle strands together. The result is a bold, balanced pattern that many people recognize instantly.
Spiral Or Chinese Ladder Bracelets
The spiral, often referred to as the Chinese ladder, has a clean, graphic appearance. You choose one strand as your wrapping strand and tie the same knot again and again around a bundle of strands. As you repeat the motion, the knots twist around the bracelet and form a spiral. It is simple to memorize and works especially well if you want to highlight one bright color.

Design Ideas To Make Your Bracelets Personal
Knowing how to make friendship bracelets is the first step. Choosing design details that feel personal is what turns them into small pieces of wearable storytelling.
Here are a few easy ways to make each bracelet feel like it belongs to a particular person or moment.
Choose Colors With Meaning
Color carries a lot of emotion. When you choose colors carefully, your bracelet feels thoughtful rather than random.
You might:
- Use your friend’s favorite color as the main strand
- Pick the colors of a sports team, school, or city you share
- Choose soft, calming shades for a friend who helps you feel grounded
- Go bright and high contrast for someone who always makes you laugh
You can keep your palette simple with just two colors or build a whole rainbow if that suits your friend’s personality.

Add Beads And Charms
Beads and charms are an easy way to make a friendship bracelet feel a little more polished. They add texture, sparkle, and tiny focal points that catch the light. You can:
- Slide small metal or glass beads onto the center strands so they form a line down the middle
- Add a bead every few rows as a repeating accent
- Cluster a group of beads in the center of the bracelet
- Attach tiny charms, such as hearts, stars, or birthstones, with small jump rings after the bracelet is finished
Beads and charms also help your DIY bracelets stack nicely with more delicate jewelry pieces you already own.
Include Initials And Short Words
Letters and symbols give your bracelet a clear message. Even a few characters can say a lot. Some ideas:
- Spell out a nickname or initials with letter beads
- Add a short word like LOVE, BFF, BRAVE, or LUCKY
- Use numbers or a special date that means something to both of you
- Place one bead in a specific color at a certain spot as a small secret only you and your friend understand
These small touches turn a simple bracelet into something that feels like it was made for one person only.

Not Up For DIY? Personalized Friendship Bracelets From TheoGrace
You might love the idea of friendship bracelets, but not feel excited about tying knots for hours. You may be short on time, or you prefer a more refined look. That’s where personalized jewelry can take over and still keep the same meaning.
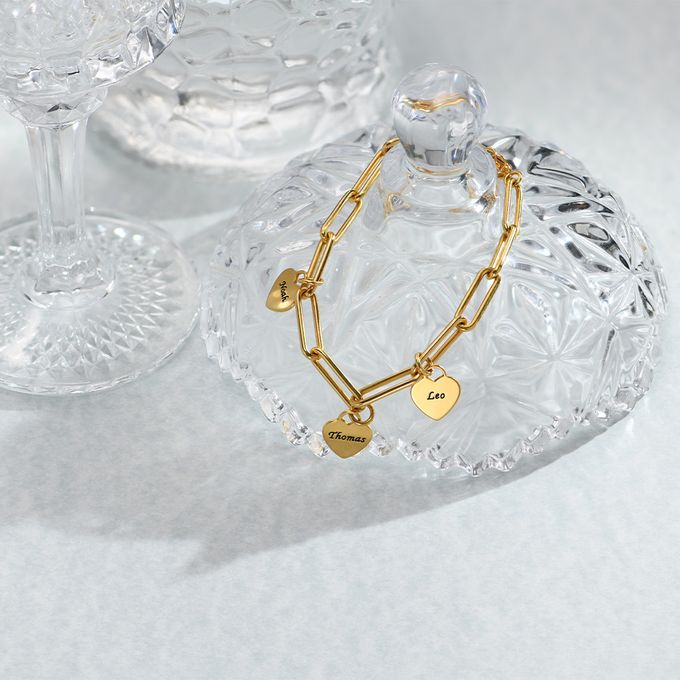
With TheoGrace Custom Friendship Bracelets, you can choose pieces that celebrate your friendships in a more polished way, such as:
- Coordinating sets that work for long-distance friendships and group gifting
DIY bracelets and personalized jewelry don’t have to compete. You can stack both together for a look that feels playful, thoughtful, and completely your own.
FAQs
What Is The Easiest Way To Make Friendship Bracelets For Beginners?
Start with simple braids or the basic candy stripe pattern. Braids use three strands and a familiar motion, while the candy stripe teaches one repeating knot you can use for many beginner patterns.
How Long Should a Friendship Bracelet String Be?
Cut each strand to about five or six times the wrist measurement. For most people, that is roughly 30 inches, or 75 to 80 centimeters. It is better to have extra and trim later.
How Long Does It Take To Make A Friendship Bracelet?
It depends on the pattern. A basic braid can take 10 to 20 minutes. Candy stripe or chevron bracelets may take 30 minutes to a couple of hours. The process is meant to be relaxing, not rushed.
Can Adults Wear Friendship Bracelets Too?
Absolutely. Adults can wear friendship bracelets to celebrate meaningful relationships and life moments. You can keep them casual or elevate them by stacking them with delicate gold, silver, or personalized pieces.
Key Takeaways
- Friendship bracelets are simple, meaningful DIY pieces that symbolize connection and shared memories.
- You only need basic supplies, such as embroidery floss, scissors, and a way to anchor your strands.
- The candy stripe pattern is the easiest place to start and teaches the core knot used in many designs.
- Beginners can also try braids, chevrons, or spiral bracelets for quick, creative results.
- Personal touches like color choices, beads, charms, and initials turn each bracelet into a one-of-a-kind gift.
- You can mix DIY bracelets with personalized TheoGrace jewelry for a meaningful, layered look.